How to crochet the Magic Ring (MR)
Crochet Stitches 101
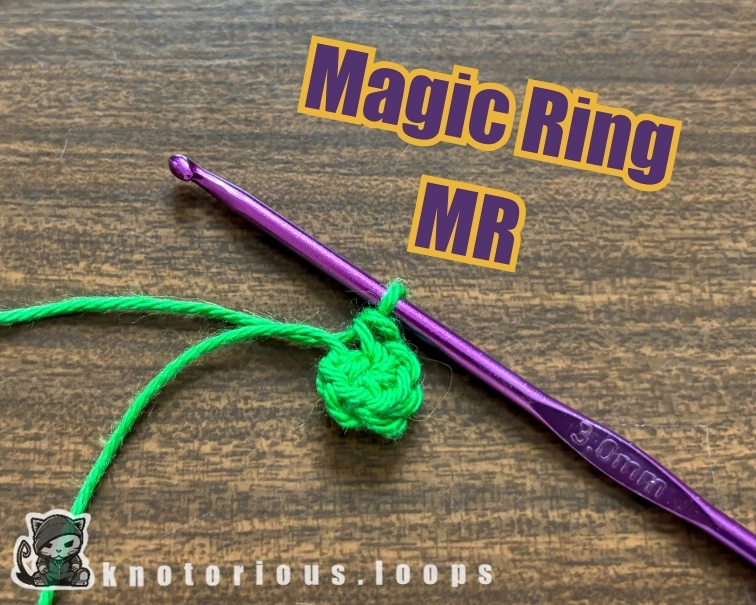
I've got the Magic in me!
Wazzuuuup Crochet Crew?
Today, we got some magic to do! And no, I have not eventually received my letter from Hogwarts after waiting for over 30 years. But maybe even better, I will show y’all how to crochet the Magic Ring (or sometimes also referred to as Magic Circle). I’m sure you have already stumbled across the abbreviation MR somewhere in a pattern. Hopefully, this tutorial of mine can shed some light on on all the magic behind the ring… so LET’S GO!
Why is this ring so magic?
The magic ring is one of the most widespread ways of starting off crochet projects. With this, it is at the same time one of the most fundamental but at the beginning of your journey as a young crocheter also one of the most challenging techniques to get the hang of. This made it the final boss for many a beginner crocheter in the past.
I was no exception to that. When I first took a shot at the Magic Ring back when I still had zero experience it seemed pretty sick voodoo to me and as if it went straight against the anatomy of my fingers. Seemed very impossible to me at the time for sure and it usually took me 30+ minutes to get that single Magic Ring done. For real! But something like 100 magic rings later it feels like second nature to me, so hang on my friends, there actually is light at the end of that tunnel!

What to use the magic ring for?
This is gonna be a quick one: the magic ring is generally used to start off projects that are worked in the round. So, with Amigurumi typically being really heavy on crocheted spheres of different sizes, the magic ring is kind of a staple. Some folks can’t stand the magic ring at all and swear by starting off all their crochet with chaining a couple stitches instead. There is a bit of a divide within the crochet community. Me of course is Team Magic Ring! I still got some issues doing the MR with super bulky plush yarn, because I keep tearing thread on closing, but that’s a different story for another time.
Step-by-step written instructions
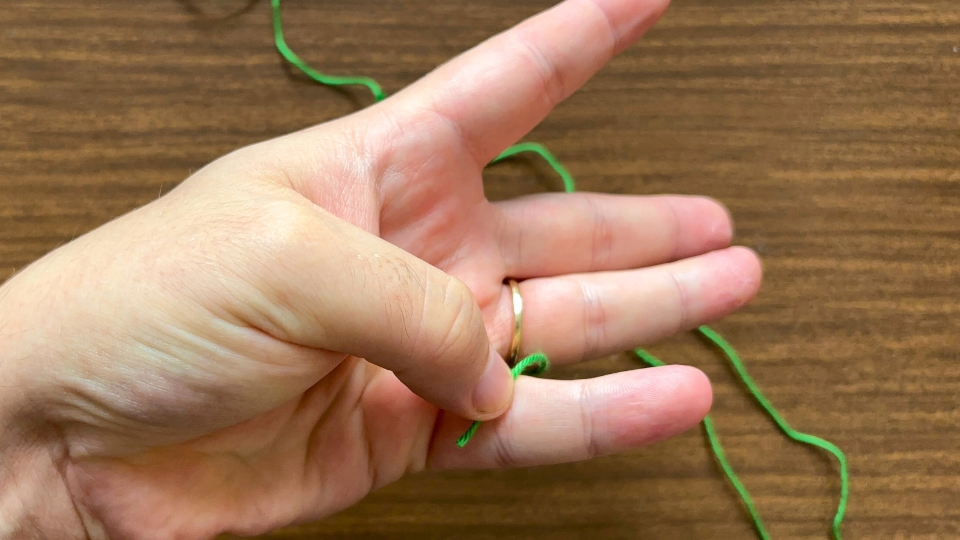
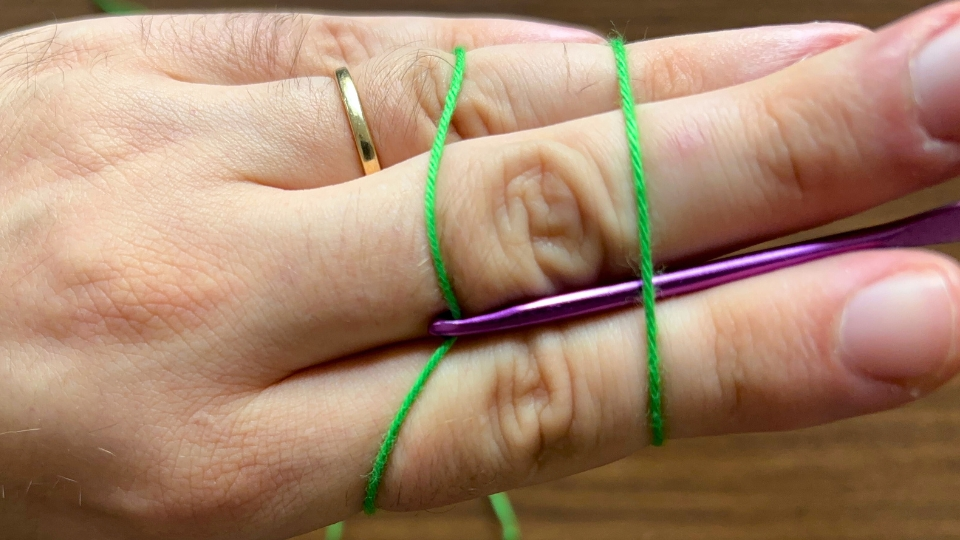
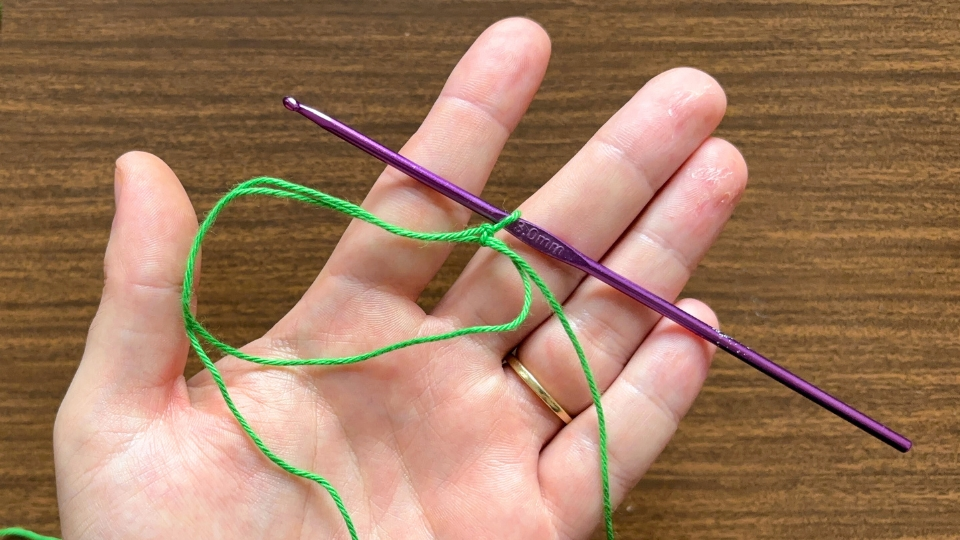
Grab the yarn that you want to work with. Take the thread and lay it facing downward on the inside of your small finger of the left hand. Then, pin it down in between your small finger and your thumb so that its position is secured and it has no way of slipping away anymore.

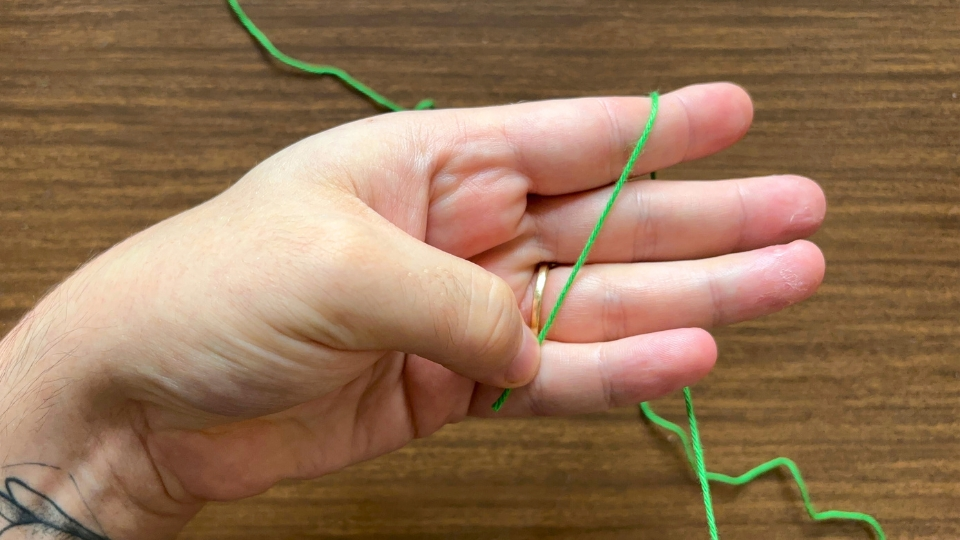
Now, while pulling slightly put the rest of the thread diagonally across the inside of your ring middle and index finger, ending up at the joint of the index finger. Then, fold back the thread around the finger and leave it hanging straight down on the outside of your fingers.

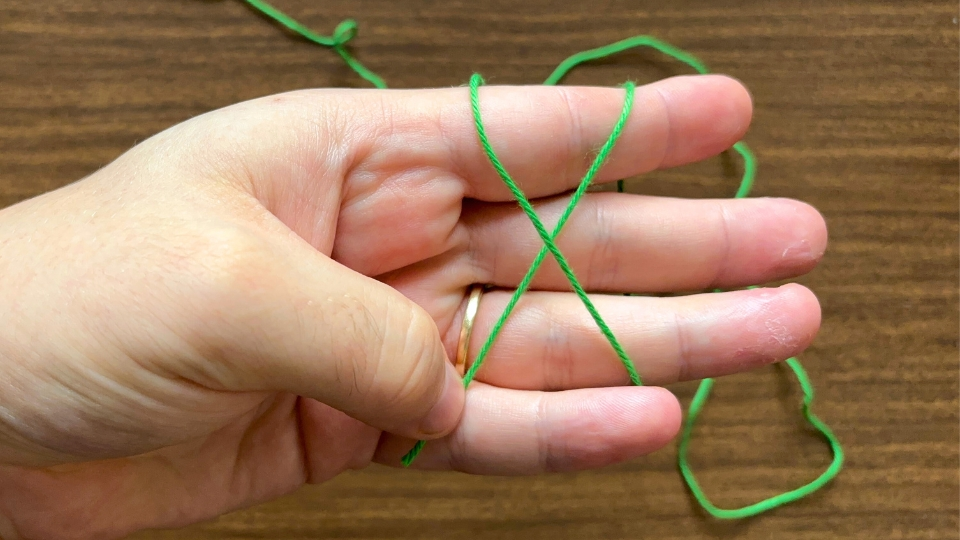
Now, starting from the joint of the ring finger the thread goes diagonally crossing the previous thread up towards the index finger. But this time end up at the other joint towards the rest of the hand.

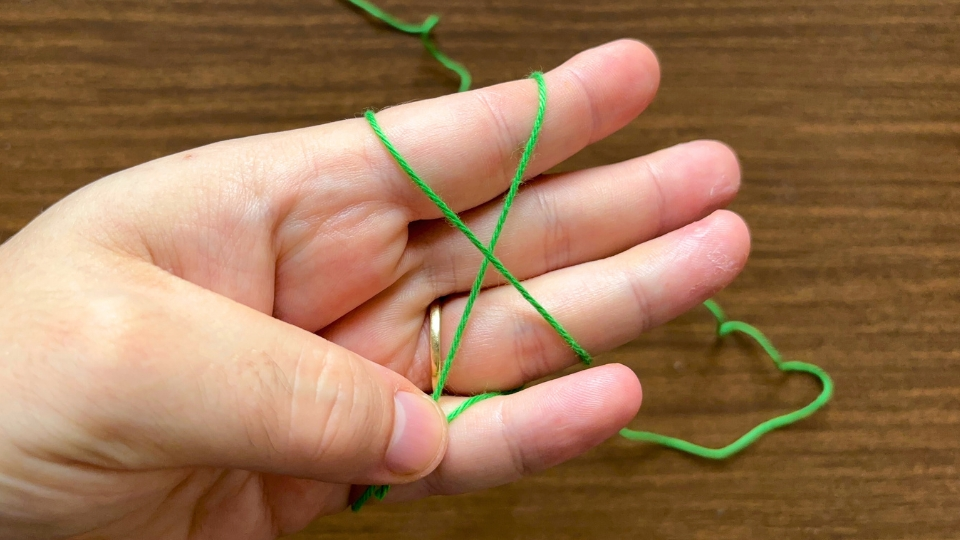
Again, fold back the thread at the index finger and again let it hang down on the outside of your hand past the 3 fingers. Now, thread it between the ring finger and the lil’ finger and secure this part between your thumb and lil’ finger also, where the part from step 1 hopefully is still waiting for you.

As soon as you get the hang of it and master the magic ring even in your sleep, above-mentioned steps 1 until 4 are done in a single fluent motion. In the beginning that all might still feel super awkward and crampy, but after some exercise muscle memory will befriend you eventually and all will be smooth.
From now on, you will also need your
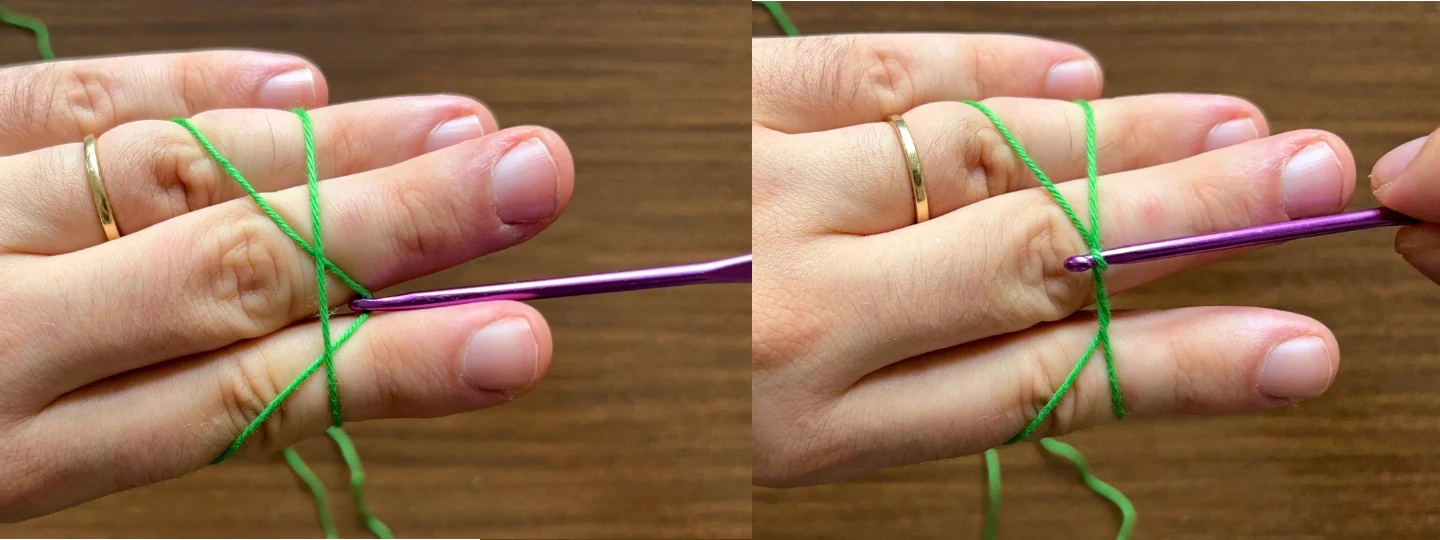
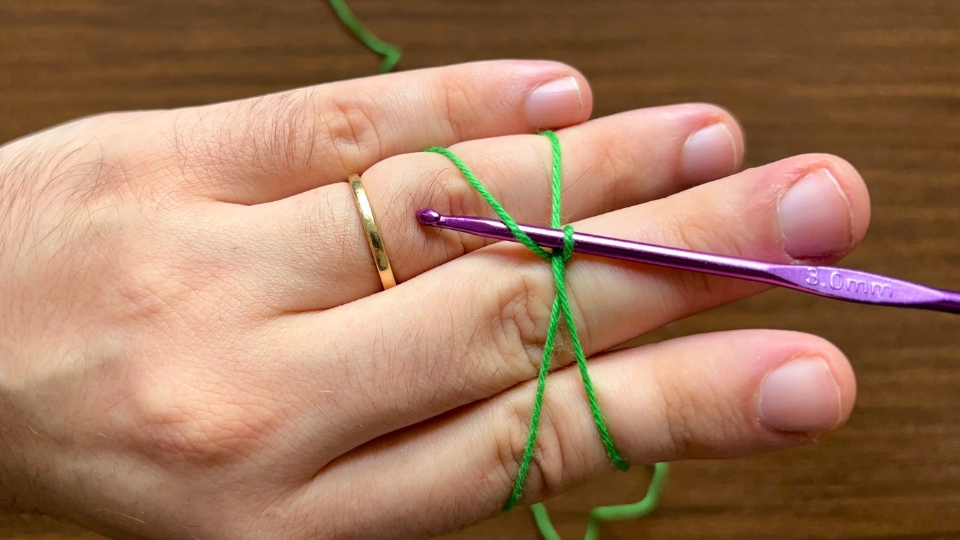
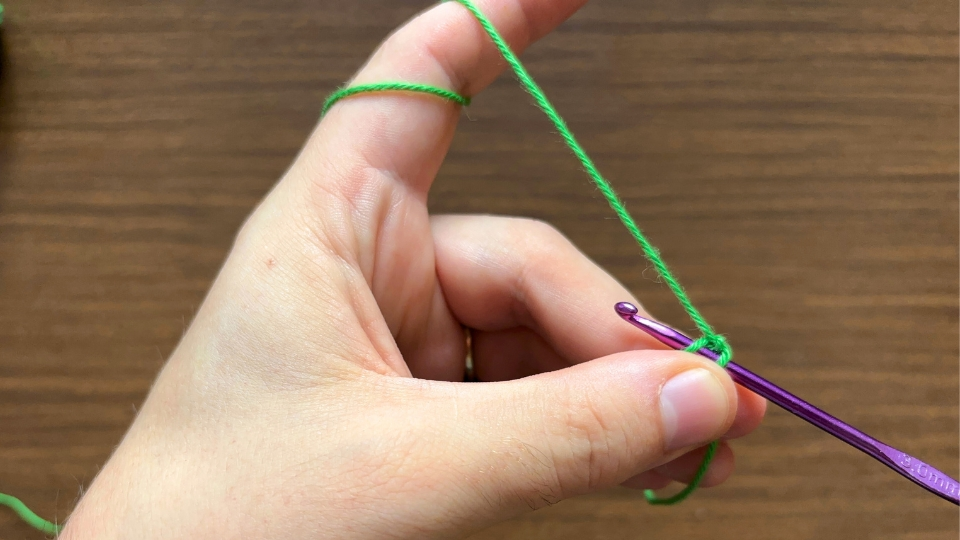
magic wandcrochet hook. Turn around your left hand so that the back of the hand is facing you. There should be 2 more or less parallel threads a couple of centimeters apart going around the ring, middle and index finger. Then, coming from the right side put the crochet hook in below the first thread and across the other.
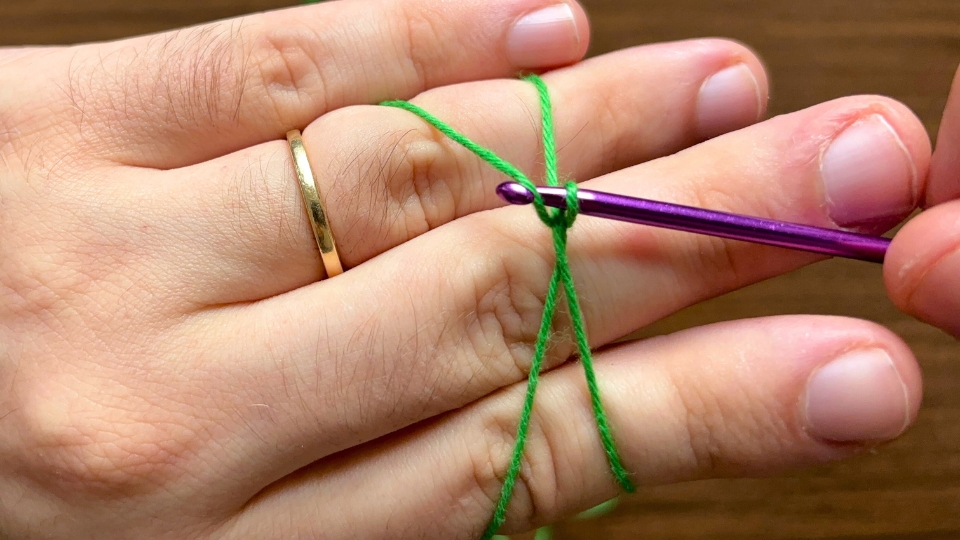
Now, use the hook to pull the latter thread through below the first one. Then, turn around the crochet hook 180° so that the open side of the hook is facing you. That way, the thread should wrap around the hook and create a loop. While doing so, be careful not to have the thread slip off your hook.

Die beiden Fäden sollten jetzt ein ‘X’ bilden. Fahr jetzt mit der Nadel unter dem linken oberen Fadenteil des ‘X’ rein, mach einen Umschlag und zieh diesen durch die Schlaufe die bereits auf der Häkelnadel ist.

With this, you should have a Ring of yarn in front of you and a single loop on the crochet hook. Keep holding it so that the end of the yarn sticks out right of the loop.

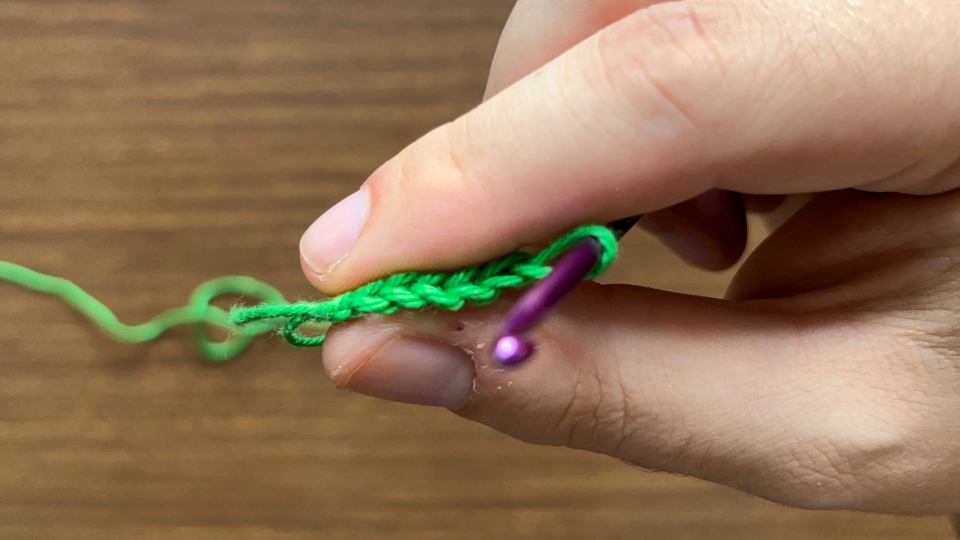
This basically concludes the magic ring itself. Now, go on working all the stitches of round 1 into that ring. When creating Amigurumi, that’s usually something like 6-10 single crochet stitches, but any combination of stitches is possible.

While working into the ring is a lot easier if you just take a tiny segment of it between your middle finger and thumb to crochet into. This might sound a bit ironic at first, but helps out quite a lot. Trust me.

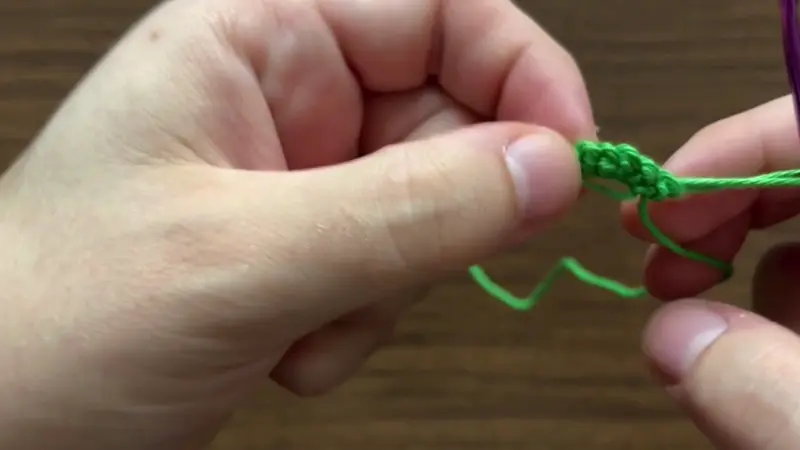
As soon as you are done with all of your first round stitches, the ring still has to be closed. To do so, grab the end of the yarn from the beginning and pull it to close the ring as far as possible. While doing so, hold the stitches from the first round in between your thumb and index finger so that all the ‘V’s form a nice column facing the same direction. That’s crucial for you to be able to easily access the stitches in the rounds to come.

After pulling the hole shut, move on to round 2 by working into the stitches from the magic ring. Be careful not to overlook the very first stitch, because that one tends to be relatively small and tight due to the tension while closing the ring. Voila!

Congrats, you've now mastered the Magic Ring! 💯
Mad props for checking out this tutorial of mine! 💜💛
Feel free to reach out to me via Instagram or E-Mail if you have any questions you wanna hit me with.
 knotoriousloops.com