How to Crochet any size Ball
Amigurumi & Crochet Design
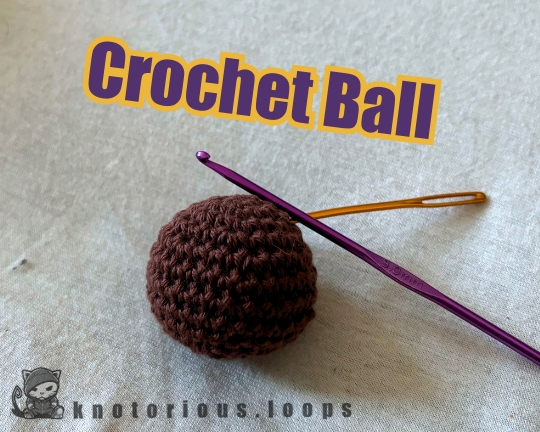
If you really want to crochet amigurumi, you need to have serious balls!
Wazzuuuup Crochet Crew?
Going back to the fundamentals, we gonna look into how to make the most basic shape in crocheting Amigurumi… that would be balls and spheres. After I am done with y’all, you will be able to create crochet balls in all different shapes and sizes, cause I will not just slap ya’ with a pattern, but we will also dive some into the background for you to better understand what’s actually going on and which variables that you might change (number of stitches, number of rounds, etc.), will lead to which result. This something I wish I had more of when I first started designing crochet & Amigurumi, but now want others to have. Let’s go!
There might also be another bonus tip for crocheting Amigurumi balls at the very end, so scrolling might really pay off this time.
Have a (crochet) ball
Why should you know how to make different size crochet balls? Quite simply, because that’s exactly what Amigurumi is in its purest form: a couple of colorful crochet balls sewn together to create character-like shapes. Of course, there are still tons of other shapes that come into play to create life-like lil’ crochet characters, but there’s absolutely no way around spheres in all different shapes and sizes. Just look at my Cat Daruma Pattern, for example. So, to sum it up for you: no crochet ball - no amigu. Comprende?
And not only will that help you crochet your Amigurumi from now on, but understanding how to arrange the stitches to create different shapes and sizes of spheres will help you so much in even designing your very own Amigurumi patterns.
Step by Step written instructions
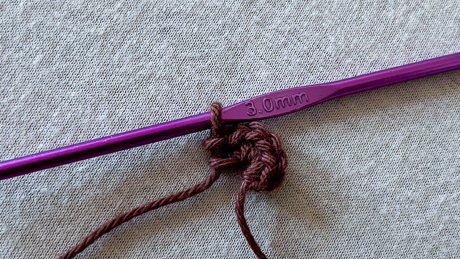
Start off with a Magic ring and put 6 single crochet stitches into the circle before pulling it tight. Ideally, start using a stitch marker from here on, to keep track of the beginning of every round.

The number of single crochet stitches you put into the Magic circle determines the shape of your subsequent circle or ball. Normally, that will be the above-mentioned 6 single crochet stitches for a crochet ball that is considered “perfectly round”. Adding more single crochet stitches into the magic ring (8 for instance) will make the slope of the resulting crochet ball flatter, while using less single crochet stitches (4 or 3 for example) will make the result pointier and look much less like a sphere or ball.
DISCLAIMER: If you are not yet familiar with those increases I keep mentioning from here on after, an increase simply means putting 2 single crochet stitches into a single stitch, leading to an increase (pretty logical right?) of your stitch count and the shape of your crochet piece growing in size.
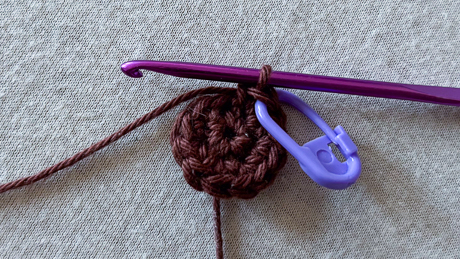
From the second round onward, we will add single crochet stitches until we reach the diameter and size of crochet ball that we are aiming to make. Every one of those “increasing rounds” should have the same number of increase stitches as we put into our initial magic ring, so in our case 6 increases per round. These are spread evenly among the number of stitches that we currently have, filling up the rest with plain single crochet stitches. You will notice that this ends up increasing the number of single crochet stitches in between increases by 1 with every round. So, for round 2 this leaves us with 6 increases without any single crochets in between.

Round 3 will be 6 times alternating between a single crochet and an increase, Round 4 then means switching between doing 2 single crochet stitches and a single increase 6 times and so on. Every round will end up with a stitch count that is a multiple of 6. The crochet ball is slowly taking shape.

Advanced: following this pattern comes with a minor problem, namely all the increases of subsequent rounds being adjacent to each other, which tend to create seam-like bulges that make our crochet ball look… not so ballsy and hence not so nice. Check this tip to avoid this
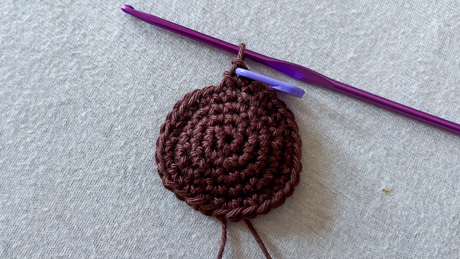
Now, we want to single crochet around a couple of times. This means doing some rounds that are only made up of single crochet stitches, so end up with the same stitch count as the previous round. This, in theory leads to straight lengthening of the shape without growing in diameter. Practically, after doing a couple of rounds with some increases, the growing of the crochet ball shape will spill over to the ‘single crochet around’ rounds.

Depending on how tall you want the shape to end up, add more rounds of this kind. When aiming for a perfectly round crochet ball, go for approximately as many rounds of only single crochet stitches as you had single crochet stitches in between increases in the final increase round, so 3 in our case. But always keep an eye on the shape of the sphere as it develops, tension, yarn and hook always have their say too.
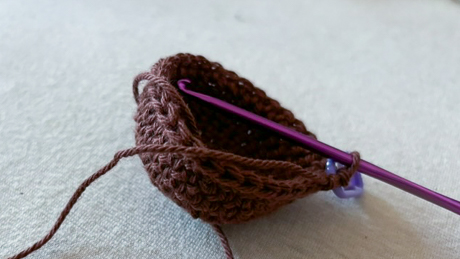
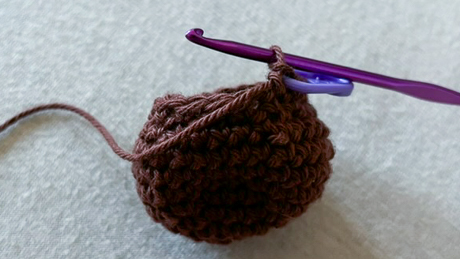
After having taken care of the height of our crochet ball, it’s time to take care of closing the lower half. For this, we will do the opposite of increasing, namely decreasing (also called single crochet 2 together sc2tog). We will basically go on mirroring the rounds we did while increasing, replacing every one of the 6 increase stitches with a decrease.
For our example sphere going until a maximum stitch count of 30, this means starting with a round repeating 3 single crochet stitches followed by a decrease 6 times. The next round, we will have to fill between the 6 decreases with 2 single crochet stitches each, leading us to 6 repetitions of a single crochet, a decrease and another single crochet stitch and so on.

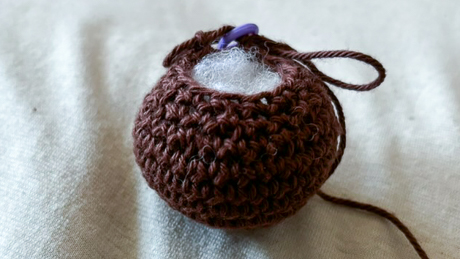
Shortly before the opening of the crochet ball becomes too small, start stuffing the sphere with fiberfill. Stuffing generally is very underrated and greatly contributes to how your final shape will turn out when creating Amigurumi. So, to get it right, just go on stuffing some filling into the hole and then kneading your ball to spread the filling within the sphere evenly and create a nice shape. Continue doing so until you have the feeling the crochet ball is evenly filled and there is enough filling in it to create a perfectly round sphere shape.

In any case, you gotta resist the temptation to overfill. This will spread your stitches and reveal ugly filling patches (trust me… been there, done that).
For the final round, you will end up with the same number of decreases as stitches from the magic ring in the beginning, 6 in our case. Now, to finish the crochet ball off, you can add some more filling if necessary and then cut the yarn, leaving a few centimeters of yarn tail. Then, pull the final loop on your hook until the end goes through, securing that the stitches cannot further unravel.

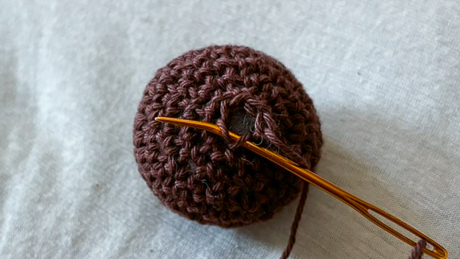
At last, to nicely close the crochet ball, use a tapestry needle to attach to your yarn tail and thread through the front loops (part of the V of the stitch closer to you) of the 6 final stitches. After doing so, pull the tail tight to close the leftover hole and hide the leftover yarn tail inside of the ball. Done!
The Pattern
Here, we got the full pattern of how we made the above crochet ball from start to finish as a reference:
| R1) | MR + 6sc | (6) |
| R2) | 6inc | (12) |
| R3) | [sc, inc] x6 | (18) |
| R4) | [2sc, inc] x6 | (24) |
| R5) | [3sc, inc] x6 | (30) |
| R6 - 8) | 30sc for 3 rounds | (30) |
| R9) | [3sc, dec] x6 | (24) |
| R10) | [2sc, dec] x6 | (18) |
| R11) | [sc, dec] x6 | (12) |
- Stuff the ball with fiberfill -
| R12) | 6dec | (6) |
Tweaking the size and shape of a Crochet Ball
Now back to the interesting part, that is learning about the more or probably rather less secret formula of how to tweak the size and shape to your wishes. These are the variables that you need to adapt to be in full control of the shape of sphere that you are crocheting:
- Number of single crochet stitches in Magic Ring
This value will decide right from the beginning how flat or pointy your shape is going to end up. The more stitches you use here, the flatter the initial circle and subsequently your whole sphere shape is going to be. Typically, this value also aligns with the number of increases & decreases that are evenly spread across the other rounds.
As a rule of thumb, you can remember the following values:
| Cone | MR + 3sc |
| Perfectly Round Sphere | MR + 6sc |
| Flat | MR + 8sc |
- How many rounds are used to increase
The longer you keep increasing, the wider the shape of your crochet ball is going to get. This of course also highly depends on the number of increases you include each round. If you are doing a Cone shape with ~3 increases per round, the width gain every round is very much coupled to an increase in height, so be aware of that.
- Number of single crochet rounds
Doing rounds of only single crochet stitches makes the shape of your crochet grow straight, so with doing more or less rounds of only single crochet stitches, you can easily influence how tall the shape of your crocheted ball is going to be.
BONUS: Avoiding the seams for a nicer Ball shape
As already eluded to previously, there is a small hack to really fine tune the shape of crochet balls. When we go as described above and keep adding another single crochet stitch between increases with every round like
| R3) | [sc, inc] x6 | (18) |
| R4) | [2sc, inc] x6 | (24) |
| R5) | [3sc, inc] x6 | (30) |
| R6) | [4sc, inc] x6 | (36) |
, all the increases end up being adjacent to the increases of previous and follow up rounds. This creates kind of a seam along the sphere shape, which is usually mitigated while stuffing, but still negatively impacts the final shape of the crochet ball.
So, in order to avoid this, we will switch up the positioning of the increases with every round. The easiest way to do this is alternating between putting the increase at the end of the single crochet stitches of every repetition and putting the increase after half of the sc’s of every repetition. Sounds complicated? It’s actually not. Just look how this changes up the example above:
| R3) | [sc, inc] x6 | (18) |
| R4) | [sc, inc, sc] x6 | (24) |
| R5) | [3sc, inc] x6 | (30) |
| R6) | [2sc, inc, 2sc] x6 | (36) |
As there is an additional single crochet stitch with every round, there will be an even number of them with every other round. These clusters very welcoming make room for an increase right in the middle of them to keep it safe and far away from its peers. That’s a super minor tweak, but with quite the impact.
That way, no 2 increases will ever be adjacent to each other and mess up the shape of your Amigurumi sphere. Neat 😻
Congrats, you now took your very first step in becoming an Amigurumi master designer! 💯
Mad props for checking out this tutorial of mine! 💜💛
Feel free to reach out to me via Instagram or E-Mail if you have any questions you wanna hit me with.
 knotoriousloops.com